
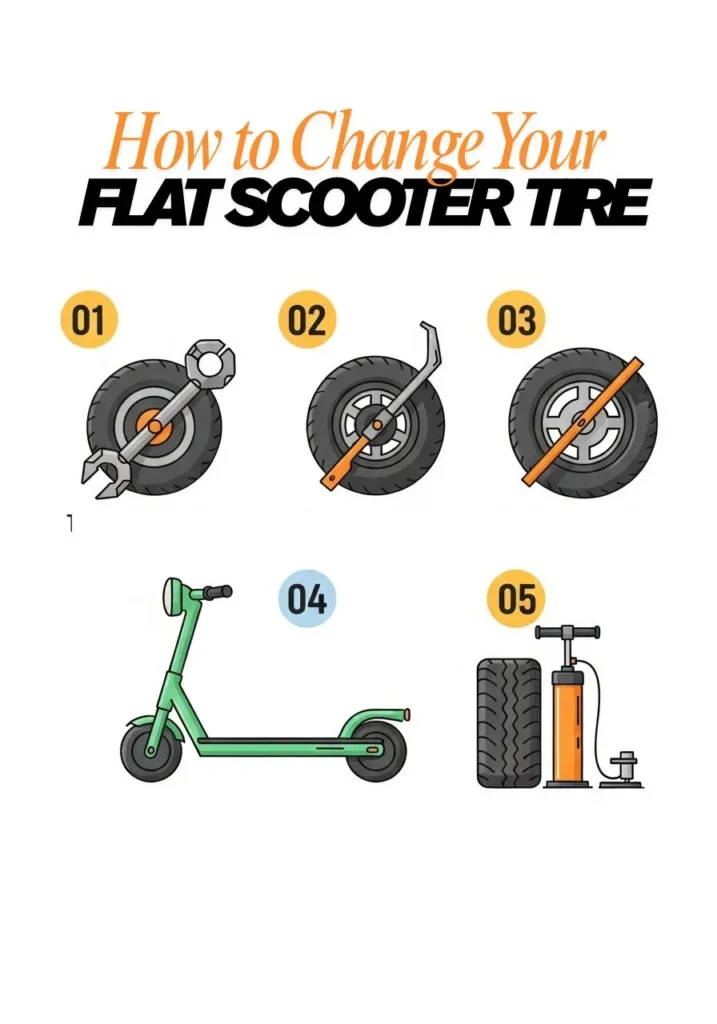
How to Change Your Flat Scooter Tire in 5 Easy Steps
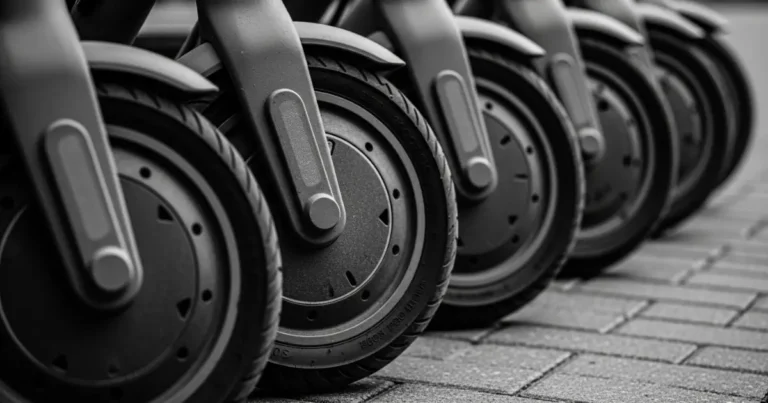
You’re running late for work, you hop on your electric scooter, and within two blocks—thump, thump, thump. A flat tire has just derailed your morning commute. If you’ve never dealt with a scooter tire change before, this moment can feel overwhelming. But here’s the good news: changing a flat scooter tire is a skill you can master in under 30 minutes, and it’ll save you money and time compared to visiting a repair shop. By the end of this guide, you’ll understand exactly how to diagnose, remove, and replace your scooter tire with confidence, whether you’re dealing with a tubeless tire or one with an inner tube. This practical knowledge is essential for urban commuters who depend on their scooters daily.
Understanding Why Scooter Tire Maintenance Matters
Why Scooter Tire Change Skills Are Essential
For first-time buyers and urban commuters, knowing how to perform a scooter tire change isn’t just about saving the $40-80 a repair shop might charge—it’s about maintaining your mobility and independence. Urban environments present unique challenges: glass shards, metal debris, potholes, and rough pavement transitions all threaten your tires daily. Studies show that electric scooter riders who commute 5+ miles daily experience a flat tire once every 3-6 months on average.
When you rely on your scooter as primary transportation, a flat tire can mean missing work, appointments, or important commitments. Repair shops aren’t always immediately accessible, and many urban riders discover their flat at inconvenient times—early morning before work or late evening after the shops close. Understanding tire maintenance also extends your tire lifespan. Riders who regularly inspect and maintain proper tire pressure (typically 40-50 PSI for most scooters) reduce puncture risk by approximately 35% and increase tire life by 20-30%.
Common Misconceptions About Scooter Tire Changes
Myth 1: You need professional tools and expertise. Reality: Most scooter tire changes require only basic tools—two tire levers, a wrench set, and about 20 minutes. The process is significantly simpler than bicycle tire changes because scooter wheels are smaller and more accessible.
Myth 2: All scooter tires are the same. Wrong. Scooters use three main tire types: pneumatic (air-filled with inner tubes), tubeless pneumatic, and solid rubber. Each requires different replacement techniques. Attempting to change a tubeless tire using tube-tire methods leads to frustration and potential wheel damage.
Myth 3: Tire patches are always sufficient. While patches work for small punctures (under 3mm), they’re temporary solutions. Sidewall damage, multiple punctures, or worn tread require complete tire replacement. Many commuters learn this the hard way after experiencing repeated flats from inadequately repaired tires.
Myth 4: You should inflate tires to maximum PSI. Actually, running tires at maximum pressure increases puncture risk on rough urban surfaces. The sweet spot is typically 5-10 PSI below maximum, which provides optimal balance between puncture resistance, ride comfort, and battery efficiency.
The Complete 5-Step Process for Changing Your Scooter Tire
Step 1: Gather Your Tools and Prepare the Workspace
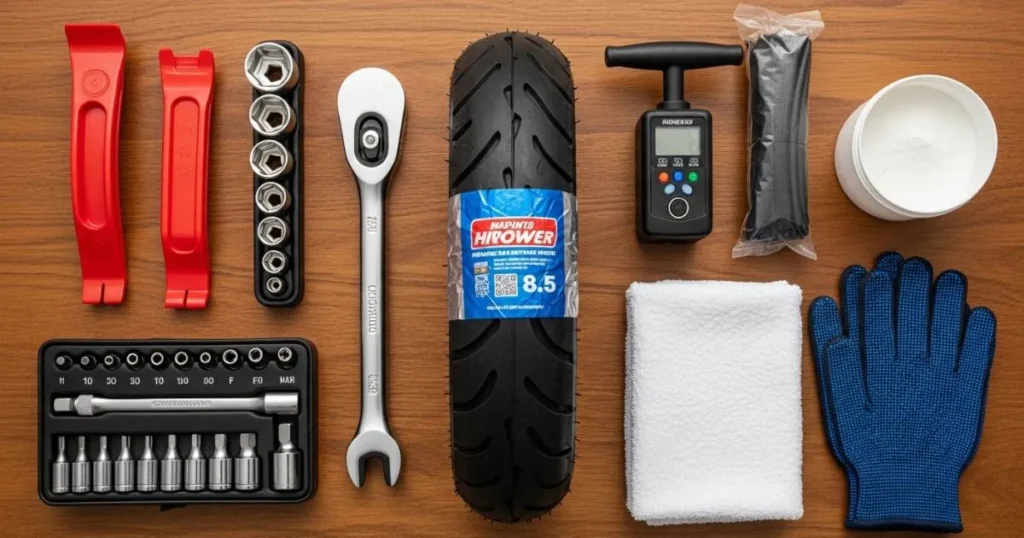
Before touching your scooter, assemble everything you’ll need. Required tools include: two tire levers (plastic preferred to avoid rim damage), a socket wrench or Allen key set matching your wheel bolts, a hand pump with pressure gauge, and your replacement tire or inner tube. Optional but helpful items include work gloves, a clean towel, and talcum powder for easier tube installation.
Set up in a well-lit area with enough space to work comfortably—your garage, patio, or even a cleared section of your apartment works fine. If you’re working outside, avoid direct sunlight on hot days as heat makes tires more difficult to manipulate. Place your scooter on its side with the flat tire facing up, or better yet, elevate it using a box or stand to create comfortable working height.
Check your scooter’s manual or the tire sidewall to confirm the correct tire size before you begin. Common sizes include 8.5×2, 10×2, and 10×2.5 inches. Installing the wrong size wastes time and potentially damages your wheel rim. Take a photo of your tire’s orientation on the rim—this reference helps during reinstallation, especially noting which direction any tread pattern faces.
Step 2: Remove the Wheel from Your Scooter
Most electric scooters use bolt-on wheels secured by 3-4 bolts on one side. Locate these bolts—they’re typically on the brake side of the rear wheel or either side of the front wheel. Using your socket wrench or Allen keys, loosen each bolt gradually in a star pattern (opposite bolts alternately) rather than removing one completely before starting the next. This prevents warping the mounting bracket.
For rear wheels: Before removing bolts entirely, note how the brake cable connects and whether there’s a brake caliper that needs clearance. Some models require you to disconnect the brake cable first—consult your manual if unsure. Photograph the brake assembly before disassembly for easy reference during reassembly.
For front wheels: These are generally simpler, though some models have disc brakes requiring careful maneuvering. Support the scooter securely before fully removing the wheel to prevent it from tipping. Once bolts are removed, gently wiggle the wheel while pulling it away from the fork. If it’s stuck, tap the axle gently with a rubber mallet—never force it, as this can damage the motor or bearings in electric scooters.
Step 3: Remove the Damaged Tire from the Rim
This is where technique matters more than strength. First, completely deflate the tire by removing the valve core (if possible) or pressing the valve stem. Any remaining air pressure makes tire removal exponentially harder.
Starting opposite the valve stem, push the tire bead into the center channel of the rim—this creates slack. Insert your first tire lever under the bead edge, hook it to a spoke, then insert the second lever 3-4 inches away. Slide the second lever around the rim circumference, progressively lifting the bead over the rim edge. Work patiently; forcing it risks rim damage.
Once one side is off, remove the inner tube if present. Pull the valve stem through its hole carefully to avoid tearing. Now remove the second bead by repeating the process. Inspect the inside of the tire thoroughly before proceeding—run your fingers along the interior surface to locate any glass, thorns, or metal fragments that caused the puncture. Missing this step means your new tube will suffer the same fate within days.
Step 4: Install the New Tire or Tube
If you’re replacing just the inner tube, slightly inflate the new tube before installation—just enough to give it shape (about 10% capacity). This prevents pinching or twisting during installation. Apply a light dusting of talcum powder to the tube; this reduces friction and prevents the tube from binding to the tire during inflation.
Insert the valve stem through the rim hole first, then carefully tuck the tube inside the tire, ensuring it sits evenly without twists. Start installing the tire bead opposite the valve stem. Push one bead over the rim edge using your hands—leverage is key, so use your palms and body weight rather than just finger strength.
Once the first bead is completely seated, begin working the second bead over the rim. The final section will be tight—this is normal. Rather than using tools (which risk pinching the tube), use the heel of your hand to roll the last section over the rim edge while pushing the valve stem slightly inward to create slack.
For tubeless tires: Ensure the rim tape is intact and the valve stem is properly seated. Apply tire sealant if recommended. Tubeless installations often require higher initial pressure (60-70 PSI) to “pop” the bead into place before reducing to operating pressure.
Step 5: Inflate, Test, and Reinstall the Wheel
Inflate the tire gradually, stopping at 20 PSI to check that the tube isn’t pinched and the tire is seating evenly on the rim. Look at the bead line molded into the tire sidewall—it should be equidistant from the rim edge all around. If you see bulges or uneven gaps, deflate partially and massage the tire to correct the seating.
Continue inflating to your scooter’s recommended pressure (check the tire sidewall or manual—typically 40-50 PSI for most commuter scooters). Overinflation risks blowouts; underinflation causes poor handling and increased puncture risk.
Before reinstalling, spin the wheel freely and check for wobbles or rubs. Reinstall the wheel in reverse order of removal, ensuring any spacers or washers go back in their original positions. Tighten bolts in a star pattern to 15-20 Nm torque if you have a torque wrench, or firmly hand-tight if not—overtightening can strip threads or crack mounting brackets.
Final check: Spin the wheel and test the brake engagement. Take a brief test ride at low speed before resuming normal use. Listen for unusual noises and feel for vibrations that might indicate improper installation.
Tailoring Your Approach for Urban Commuting
How Scooter Tire Change Skills Apply to First-Time Buyers and Urban Commuters
Urban commuting environments demand different tire strategies than recreational riding. City streets present constant hazards—bike lanes often accumulate debris swept from car lanes, construction zones scatter sharp objects, and the start-stop nature of urban riding creates more tire stress. First-time scooter buyers should expect to change or repair tires 2-4 times in their first year while learning optimal routes and tire pressure management.
For daily commuters covering 5-10 miles, carrying emergency supplies transforms breakdowns from disasters into minor delays. A compact repair kit (tire levers, spare tube, mini pump, and multi-tool) fits in most backpacks and enables roadside repairs. Many experienced urban riders also carry tire sealant and keep a spare tube at their workplace—a $15 investment that eliminates the stress of being stranded mid-commute.
Consider your commute distance when selecting tire types. Pneumatic tires offer superior comfort and efficiency for longer commutes (3+ miles) but require more maintenance. Some urban riders on shorter routes (under 2 miles) choose solid rubber tires to eliminate flats entirely, accepting the harsher ride quality as a worthwhile tradeoff. Weather conditions matter too—wet urban streets increase puncture risk as debris becomes harder to see and avoid.
Best Practices for Urban Commuter Tire Maintenance
Do maintain consistent tire pressure. Check weekly using a quality pressure gauge. Urban temperature fluctuations cause 2-5 PSI pressure changes between morning and afternoon—adjust accordingly. Properly inflated tires reduce puncture risk and extend range by 10-15%.
Don’t ignore early warning signs. If you’re refilling tires more frequently than weekly, you have a slow leak. Address it immediately rather than waiting for a complete flat during your commute. Small punctures are easier to patch; slow leaks often worsen into sidewall damage requiring full tire replacement.
Do inspect tires during regular cleaning. Embedded glass or metal fragments often don’t cause immediate flats but create weak points. Remove debris promptly before it works deeper into the tire. Look for cuts, bulges, or worn tread patterns indicating replacement need.
Don’t mix tire types or sizes. Using different tire pressures or types front-to-rear creates handling imbalances, especially dangerous in wet conditions or during emergency stops. Replace both tires together if possible, or at minimum maintain identical specifications.
Do rotate your tires strategically. Rear tires wear faster due to motor torque and weight distribution. Swapping front and rear tires at 50% wear extends overall tire life by 25-30%. For urban riders doing 5 miles daily, this means rotating every 2-3 months.
Common mistakes urban commuters make: Delaying tire changes until tread is completely gone (reducing puncture resistance by 60%), using automotive tire sealant instead of bicycle-specific formulas (which clogs valves and damages inner tubes), and neglecting to clean rim surfaces before installing new tires (allowing debris to puncture from inside).
Advanced Maintenance Strategies for Experienced Riders
Pro Tips for Extending Tire Life and Performance
Install tire liners for enhanced protection. These kevlar or plastic strips sit between the tire and tube, blocking punctures from glass and thorns. They add minimal weight (30-50 grams per wheel) while reducing flats by approximately 70% in urban environments. Products like Mr. Tuffy or Rhinodillo cost $10-15 per wheel and pay for themselves after preventing just one repair.
Use sealant even in tubed tires. Pre-filled tubes or adding 2oz of sealant through the valve prevents 80% of small punctures (under 2mm) from causing complete flats. The sealant automatically plugs holes as they occur. Replace sealant every 6 months as it dries out, especially in hot climates where evaporation accelerates.
Master the art of pressure optimization. Rather than using one pressure year-round, adjust seasonally. Summer heat increases pressure naturally—reduce by 5 PSI in hot weather to prevent overinflation and blowouts. Winter cold requires 5 PSI additions to maintain proper contact patches. Track your adjustments and note how different pressures affect your range and comfort.
Learn to read tire wear patterns. Center wear indicates overinflation; edge wear suggests underinflation. Uneven wear on one side points to motor or suspension issues requiring professional attention. Replacing tires before complete wear-out is financially smart—the last 20% of tread life is when 60% of punctures occur.
Pre-stretch new tires. Before final installation, partially inflate the new tire off the rim, let it sit 24 hours, then deflate and install normally. This “pre-stretching” prevents the tire from stretching during initial rides, which can create bead-seating issues and slow leaks.
Cost Analysis and Long-Term Investment Planning
Understanding the financial aspects of tire maintenance helps you make informed decisions. Basic cost breakdown: Quality pneumatic tires cost $15-30 each, inner tubes run $8-12, and tire liners add $10-15 per wheel. A complete tire change at a shop costs $40-80 per wheel including labor.
Learning to change your own tires saves $60-140 annually for typical urban commuters experiencing 2-3 flats per year. Over a scooter’s typical 3-5 year lifespan, DIY maintenance saves $200-700—enough to upgrade to a better scooter or invest in premium puncture-resistant tires.
Tubeless conversion represents a larger upfront investment ($40-60 for conversion kits plus compatible rims) but delivers long-term savings. Tubeless setups reduce maintenance frequency by 80% and eliminate the $8-12 tube replacement cost per flat. However, tubeless repairs require different techniques and tools, so factor in the learning curve before converting.
When to pay for professional service: Complex issues like motor wheel rebuilds, bent rims requiring trueing, or tubeless bead seating problems justify shop visits. But routine tire changes, pressure adjustments, and basic puncture repairs should be DIY tasks—the skills transfer across all your wheeled devices from scooters to bicycles.
Budget $60-100 annually for tire-related expenses if self-maintaining, or $120-200 if using shops. High-mileage commuters (10+ miles daily) should double these estimates and consider premium puncture-resistant tires ($40-50 each) that deliver 50% longer life.
Frequently Asked Questions
Q: How long does it take to change a scooter tire for the first time?
Your first tire change will likely take 45-60 minutes as you familiarize yourself with the process and your specific scooter model. By your third attempt, you’ll reduce this to 20-30 minutes. Most of the time isn’t actual work—it’s problem-solving how your particular wheel mounts and carefully checking your work.
Some riders find front wheels slightly faster (15-20 minutes) than rear wheels due to brake complications. Setting up your workspace properly and having all tools ready before starting reduces time significantly. Consider your first change a learning investment; the time savings multiply quickly across future repairs.
Q: Can I use car tire sealant in my scooter tires?
No—automotive tire sealants are formulated for much larger volumes and contain compounds that clog the small valves used in scooter tires. Use bicycle-specific sealants like Slime, Orange Seal, or Stan’s NoTubes instead. These products are designed for high-pressure, small-diameter applications matching scooter specifications. Automotive sealants also create balancing issues in small wheels, causing vibrations at speed.
The correct bicycle sealant costs $8-12 for enough to treat 2-3 tires and actually works as intended. Using the wrong product might save $3 upfront but costs you a ruined tire, clogged valve, and potential safety issues from imbalanced wheels.
Q: Should I replace both tires at the same time or just the damaged one?
Replace only the damaged tire unless both show significant wear (tread depth below 50%). However, always match tire specifications exactly—same brand, model, and size on front and rear wheels. Mismatched tires create handling inconsistencies, especially during braking and turning. If one tire failed prematurely (under 500 miles), investigate the cause before replacing: check for rim damage, improper pressure, or riding style issues. Many commuters keep one spare tire at home for emergency replacements, then replace the second tire during routine maintenance when the first reaches 60-70% wear.
Q: What’s the difference between tubeless and tubed scooter tires?
Tubed tires contain a separate inflatable inner tube inside an outer tire casing, similar to traditional bicycle wheels. They’re easier to repair (patch or replace tube) but more puncture-prone since any sharp object that penetrates both layers causes immediate deflation. Tubeless tires seal directly to the rim without a separate tube, using sealant to automatically plug small punctures as they occur. Tubeless systems offer superior puncture resistance but require compatible rims with airtight sealing. Installation is more challenging initially, but maintenance is reduced by approximately 70%. Most budget scooters use tubed systems, while premium models ($800+) increasingly feature tubeless wheels.
Q: How do I know when my scooter tire needs complete replacement versus a simple patch?
Replace tires when: tread depth is worn below 1.5mm (about the thickness of a credit card), sidewalls show cracks or bulges, there are multiple punctures within a 3-inch area, or the tire is over 2 years old regardless of wear. Patch when: you have a single small puncture (under 3mm) in the center tread area with adequate remaining tread depth and no sidewall damage. Never patch sidewall damage—those repairs fail catastrophically. Urban commuters should also replace tires after 1000-1500 miles even if tread appears adequate, as the rubber compound hardens with age and UV exposure, reducing puncture resistance by 40-50%. Age-related failure is common in scooters stored outdoors or in direct sunlight.
Take Control of Your Urban Mobility
Mastering the scooter tire change transforms you from a dependent rider into a confident, self-sufficient commuter. The essential skills covered—proper tool selection, systematic wheel removal, tire installation technique, and pressure optimization—apply across virtually all scooter models and tire types. Remember that urban riding demands proactive maintenance: weekly pressure checks prevent 70% of potential flats, while carrying basic tools means a 10-minute roadside repair instead of an hour-long walk home.
Start by inspecting your current tires today. Check tread depth, look for embedded debris, and measure pressure accurately. Order your basic tool kit if you don’t have one—two tire levers, a quality pump, and a spare tube cost under $30 total but deliver immediate peace of mind. The 30 minutes you invest learning this skill today saves hours of frustration and maintains your commuting reliability for years ahead.